Gate Brigade: choose the gate you can safely reach
Gate Brigade fires automatically, leaving you to decide where the squad should stand. That position affects which gate receives shots, which panel you cross, and whether you can escape the next obstacle. A gate’s displayed number is a changing offer. Compare it near the crossing, then steer with the next stretch of road in mind.
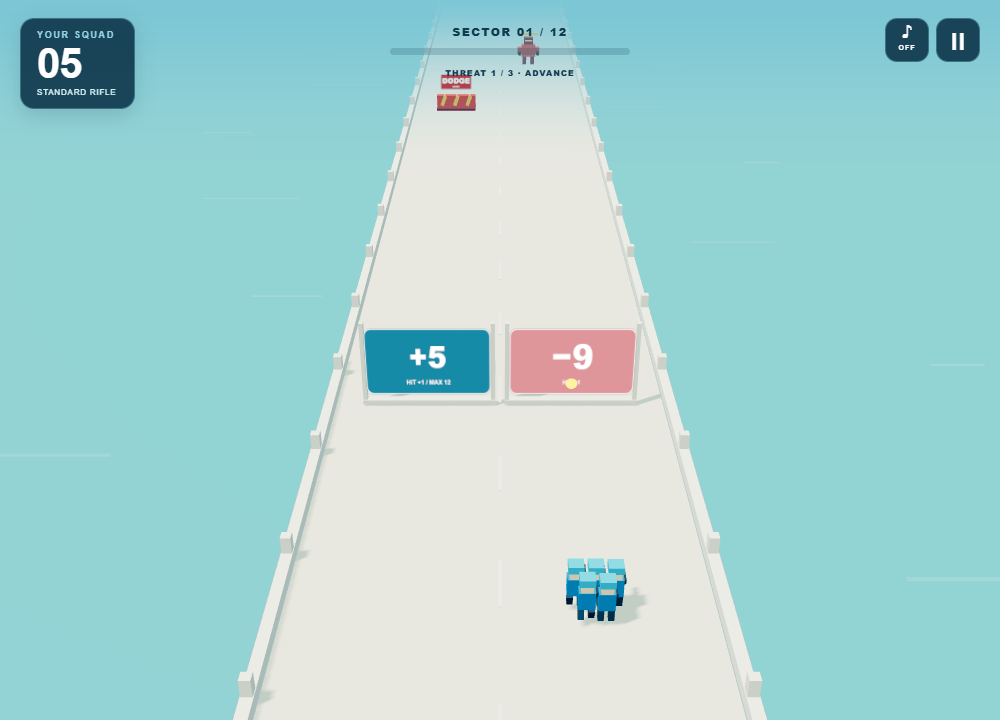
Read what one bullet changed
Each bullet that reaches an additive gate increases its value by one until that gate’s cap. In the screenshot, a hit changed −10 to −9; it did not immediately turn the penalty into a reward. The first blue gate starts at +5 and stops at +12, so it needs seven arriving hits to reach its cap. Early gates have lower caps than later ones. Firing toward a distant panel is not enough by itself: bullets have limited range, and the hit flash marks when a shot actually reaches it.
Compare the resulting squad, not just the sign
With five troops, an unchanged +5 gate gives ten. A −9 gate would remove the entire starting squad, ending the run. Later, with twelve troops, +16 would give twenty-eight while ×2 would give twenty-four; multiplication is not always the larger result. With thirty troops, ×2 gives sixty while +16 gives forty-six. These are comparison examples rather than a promise that those exact pairs appear together. The squad cap is 72, so doubling fifty yields 72, not 100. Shots never increase the ×2 multiplier.
Cross a panel, then look past it
The narrow space between paired panels gives no recruitment reward. Commit to the actual panel you want, but inspect the barrier beyond it before settling into that lane. Striped barriers cannot be destroyed by gunfire. They remove at least ten troops and can cost roughly a quarter of a large squad, making a small extra gate gain a poor trade for a collision. The road speeds up twice during a sector, so leave more room for the lane change than you needed at the start.
Respond to the warning before the volley
Sentries mark an orange lane before firing. The mark stays on its locked lane, so moving away lets you avoid the incoming attack; destroying the sentry also cancels its pending shot. Gold crates upgrade the weapon through rapid fire and heavy rounds. At the boss, red ground marks and a countdown preview the attack. The boss mixes aimed shots, two-lane sweeps and crossfire, then attacks faster below half health. Recheck each warning instead of relying on one safe lane for the entire fight.
Know which clear you are trying to earn
Defeating the boss earns one star. Finish with at least eighteen troops for two. Three stars require at least forty survivors and no more than two damaging hits. Negative gate crossings count as hits, as do barriers and enemy attacks, so a large peak squad does not guarantee three stars. Read survivors and hits on the result screen to decide what to improve next. The twelve sectors unlock in order; best stars and unlocks save locally, while an unfinished run starts over after a reload.
About this guide
Rules checked against this edition’s game code and interface. The screenshot shows the actual game. Strategies are suggestions; they do not guarantee a particular score.